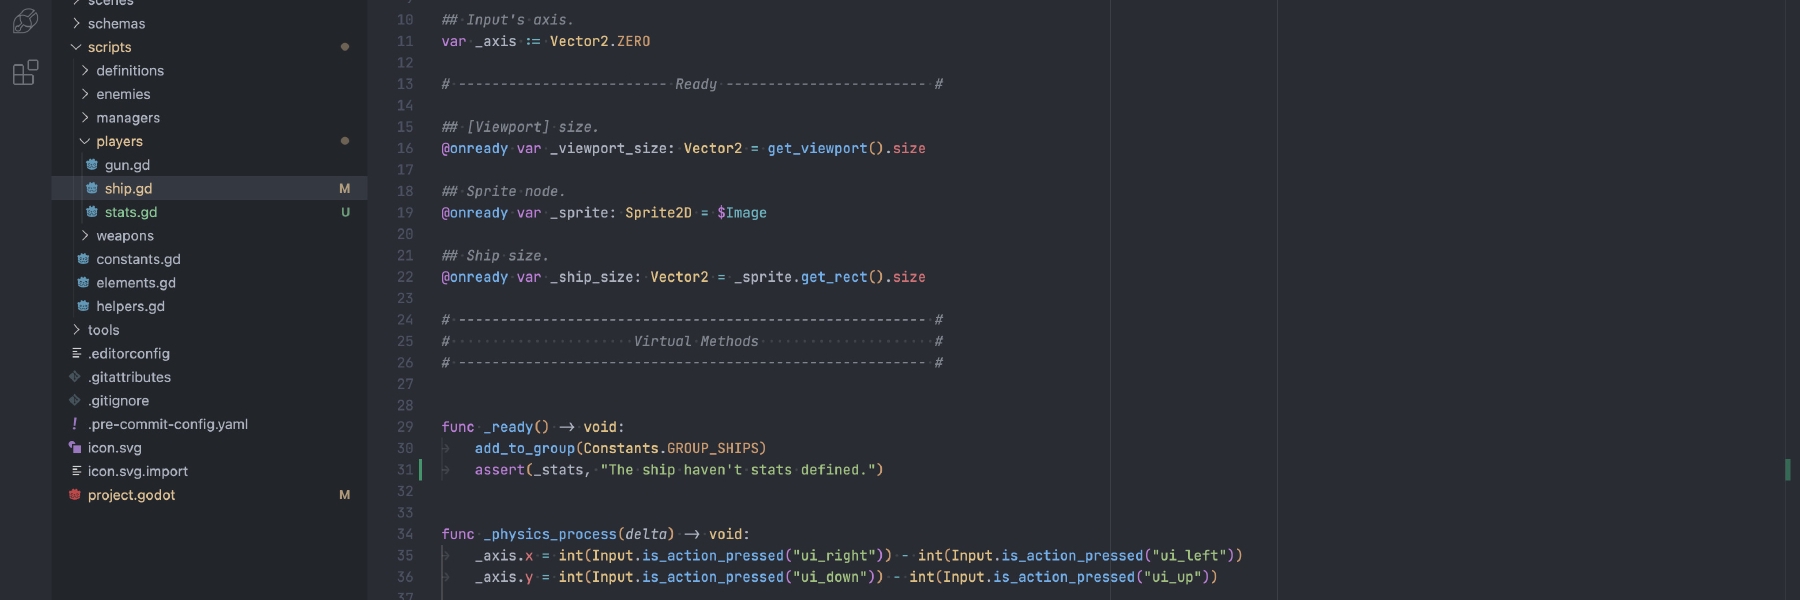
What is Godot? #
Godot is a free
and open-source game engine released in 2007 and written in C and C++. A game engine is
an application that can help you develop your games using a GUI with many features
already included inside it.
To name a few: Physics, collision detection, image, audio, and so many others.
You can use it for 2D or 3D games as well.
The advantage of using a game engine is to develop in one place and export in many different ones, like Windows, macOS, Linux, or on mobile for iOS and Android.
There are a lot of game engines in the marketplace, but today I want to talk about Godot, why I love it, and why I use it.
This tutorial presents you Godot 4 and not Godot 3.
Discover Godot together #
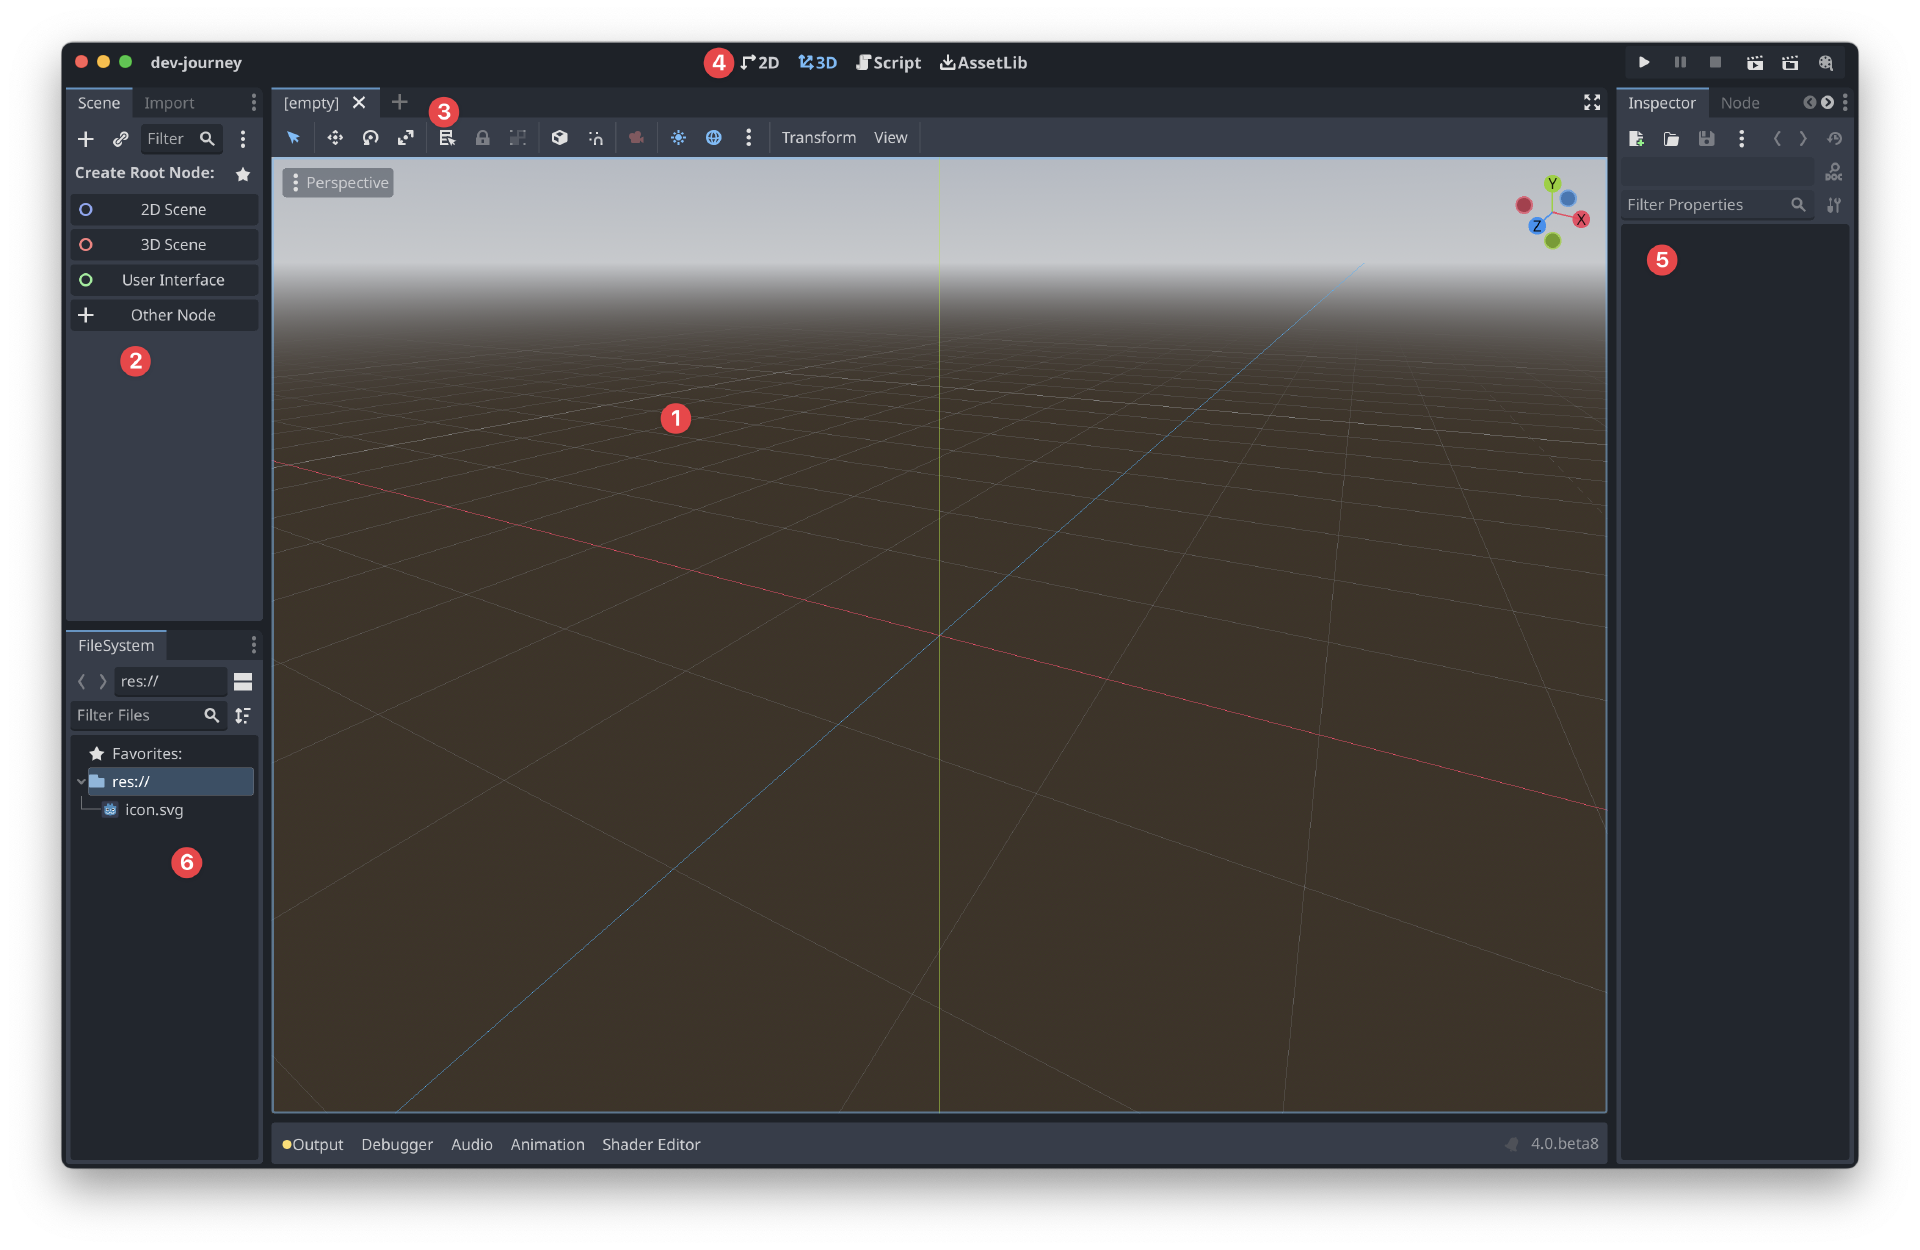
This is the stater interface when you just created your project:
Quit neat and straightforward! Let’s discover each part of the interface that I marked with numbers on the image.
-
It is the scene. It is where you will put your game objects. In 3D games, it could be
the character, a wall, a door, a… you got it, I think.
In 2D, it could be an image, a tilemap, or any 2D stuff required for your game. -
It is the architecture of your nodes. A node is a game object where you attach a
script to apply any behavior you want.
But every node has a particular specificity; it could be an image, a timer, or many other things useful to build a game. Each node has properties that can be changed in the inspector to change the defaults behaviors of a node. We will see it later in this tutorial. -
The toolbar, this is where you can select tools used to manipulate a node, like moving
or rotating, for example.
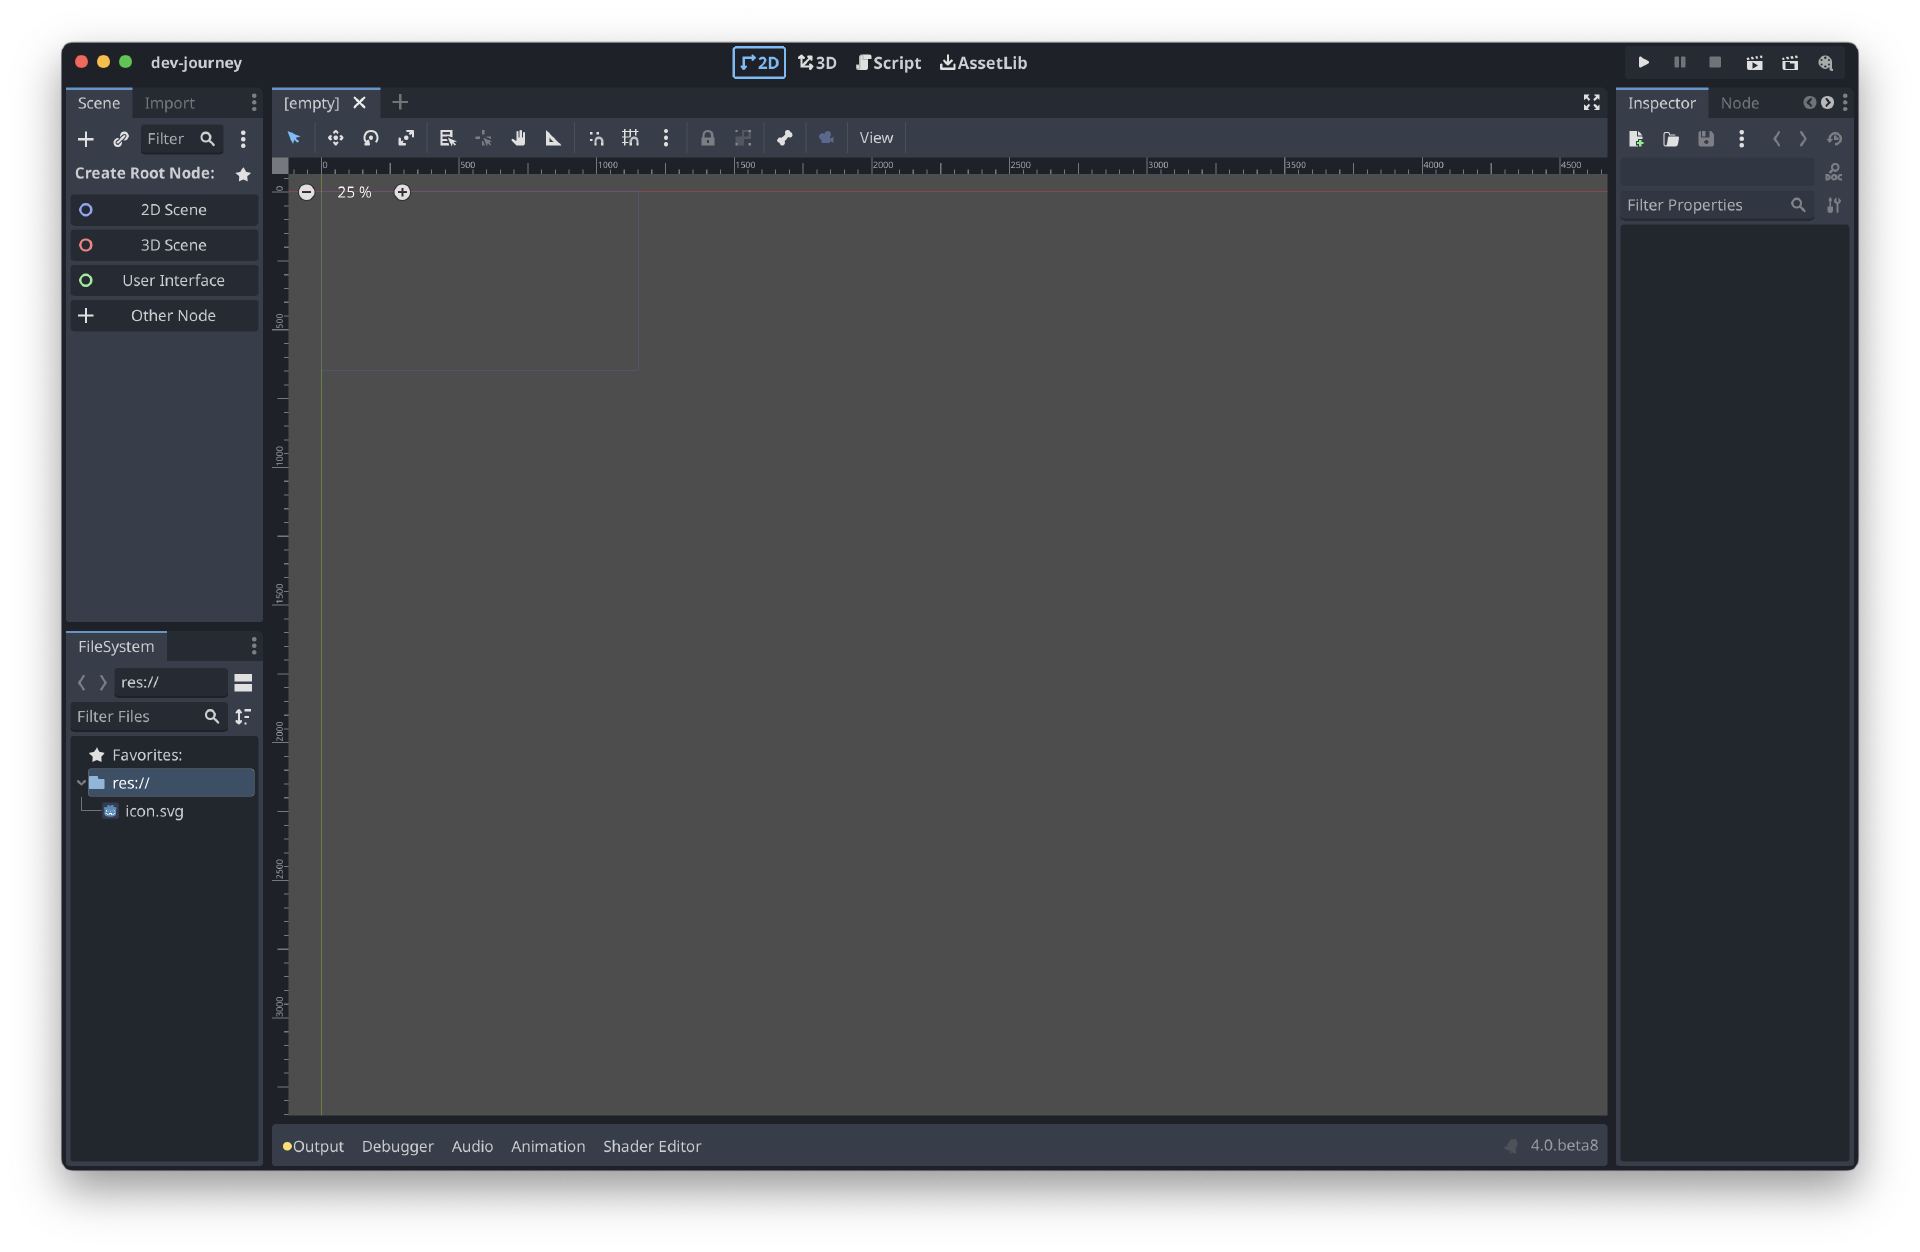
Scenes tabs will also be displayed there, allowing you to switch between them as you can with browsers. - You may create a 3D, perhaps a 2D game; here, you can select which game you want. The plane will adapt depending on your choice. On the above picture, the 3D plane is selected. Here is how the 2D one is rendered:
The third tab is Script; it’s where you will code. Yes, you read well;
Godot has a
built-in editor that allows you to code directly inside it, with autocompletion,
documentation, and coffee… OK, maybe not this one, but you can open a PR for this 😉
AssetLib allows you to install assets to extend your game’s
functionalities.
-
This is the inspector. As I said before, when you click on a node, in this part of the
interface, you can change values that will affect the node itself. For example, if you
have a sprite node, you can change its angle in the inspector.
Take a look at the video to see it in action:
Powerful isn’t it?! 😎
- The files inspector. This is where you can see all the files of your project. You can create, delete, rename, or organize all files.
Development #
You may be wonder which languages you can develop your game with
Godot; by default,
you can choose GDScript or C#. I can bet that you don’t know
one of these two languages. It’s logical, GDScript has been developed for
Godot, and it is
the official language of the engine. Don’t go Google it; here is the
link
to learn the basics.
BUT! It does not stop here! You can use more languages to develop with
Godot. People out
there are fantastic and created bindings to allow using other languages like Rust or
Golang to work with
Godot. I let you
Google it this time because I will focus on GDScript in this tutorial.
GDScript #
GDScript is a language developed especially for Godot; its syntax is very close to
Python.
In Godot 4, GDScript has been updated to version 2, allowing it to do more than it can
do in Godot 3.x.
Let’s take look at the basic syntax.
    # Declare a variable of type "int" and assign it the value 10.
var my_var: int = 10

# Declare a variable and assign it the value 10.
# Short variable declarations (:=) will let the compiler
# determine the variable type.
# Here it will assume that the type is "int" as the value is an integer.
var my_var := 10

# Function declaration with one parameter of type "string".
func my_function(my_param: String):
	# Print to the console the parameter.
	print(my_param)
I’m sure you can see some similarities with Python now, and yes, the indentations define the code blocks.
For sure, there are some differences, like variables declarations need to have the
keyword var or const at the beginning or to use
func instead of def.
Move the sprite in the window #
We will learn how to move the sprite we created in the upper video.
Moving the sprite in the window is possible, but we want something else; a sprite alone
is useless. You will need to make the sprite a child of another node, a
CharacterBody2D.
The CharacterBody2D node helps create a playable character controlled by a
script. Here is the official description:
Specialized 2D physics body node for characters moved by script.
You need to know that Godot is full of valuable shortcuts, and you will understand.
Right-click on the sprite and click on Reparent on New Node.
Select the node CharacterBody2D and validate. Your sprite is now a child of
the node CharacterBody2D; isn’t that cool?
Create and attach a script to the CharacterBody2D node #
To create a script, right-click on the node CharacterBody2D and click on
Attach Script. A window will open; change the path where you want to save
your script and click on Create. I recommend you create a folder called
scripts at the root of your project and save scripts inside.
The script editor will open automatically. Create a function called
_physics_process as the following:
    func _physics_process(delta):
	pass
If you are unfamiliar with Python, pass is a placeholder keyword that does nothing. It is used to prevent the script from crashing if no code is written inside the function.
Like Pyhton, GDScript uses indentation to define code blocks.
I know you are wondering what is the delta parameter 🤔 It is the time
between two frames. A game runs at 60 frames every second so the
delta parameter will give you the time elapsed from one frame to the next
one.
Move the sprite #
The physics process function is called every frame, and as we need to move the sprite and detect collisions, this is the right place to do it.
Update your code as follows:
    var axis: Vector2 = Vector2.ZERO

func _physics_process(delta):
	# Check if the user is pressing the up key.
	if Input.is_action_pressed("ui_up"):
		axis.y -= 1
	# Check if the user is pressing the down key.
	elif Input.is_action_pressed("ui_down"):
		axis.y += 1
	else:
		# Nether up or down is pressed, reset the axis.y value.
		axis.y = 0
Let’s take a look step by step at what we just did. First, we add a variable called
axis of type Vector2 with a default value of 0, which means
x = 0 and y = 0.
Then, we check if the user is pressing the up key; if so, decrease the
axis.y value by 1, which means that the sprite will move up. If the user is
pressing the down key, increase the axis.y value by 1, which
means that the sprite will move down. In case the user is doing none of these actions,
we set the axis.y value to 0 to reset the movement.
That’s great, but still not enough… OK, let’s add the left and
right movements:
    if Input.is_action_pressed("ui_left"):
	axis.x -= 1
elif Input.is_action_pressed("ui_right"):
	axis.x += 1
else:
	axis.x = 0
Very little has changed here except checking if the user is pressing left or right; there is no need for further explanation.
One more thing before having fun 😅 The vector needs to be normalized. To do so, add the following line after the lines we just added:
axis = axis.normalized()
So simple 😎 Maybe you are wondering why we are doing this. Well, if you press
right, you will move by 1 pixel, but if you press up and
right simultaneously, you will move by 1.41 pixels, not one as you may
think!
To understand why, you must know how to calculate a vector length.
x = 1^2 and y = 1^2, so x + y = 2 as
1^2 = 1; then, you need to calculate the square root of 2, which is 1.41.
OK, finally, we reached the last part to be able to move the sprite! Add the following after the line we just added:
move_and_collide(axis * 300 * delta)
Move and collide
is a built-in method of the CharacterBody2D node. It is used to move the
node and detect collisions with other nodes, but this is different from the subject of
this tutorial.
The axis represents the vector with just created, the 300 is a speed value,
and the delta is the time between two frames. It is essential to multiply
with the delta; if you don’t do this, the node will move faster on a computer with high
performance, to put it simply. This allows you to run your game the same on every
computer, and it considers whether your computer is lagging or not.
Run the project #
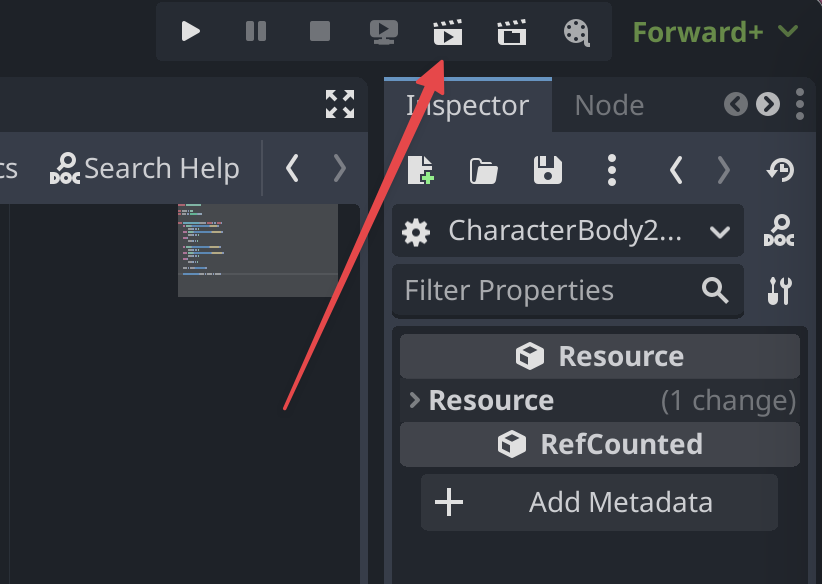
I’m sure you can’t wait to run the game! To do so, click on the
Play Scene button at the top right of the editor.
The difference between the Play Scene and the left one, which is the
Play button, is simple; the Play button will run the main
scene of your game, and the Play Scene will run the scene you are currently
working on.
You will have this result:
Add a speed variable #
Hard coding something in a script is a bad practice. Create a variable to store the speed value:
    var speed: int = 300

# Other code

move_and_collide(axis * speed * delta)
Much better!
The full script #
    extends CharacterBody2D

var speed: int = 300
var axis: Vector2 = Vector2.ZERO


func _physics_process(delta: float) -> void:
	# Check if the user is pressing the up key.
	if Input.is_action_pressed("ui_up"):
		axis.y -= 1
	# Check if the user is pressing the down key.
	elif Input.is_action_pressed("ui_down"):
		axis.y += 1
	else:
		# Nether up or down is pressed, reset the axis.y value.
		axis.y = 0

	# Same as before, but for the keys left and right.
	if Input.is_action_pressed("ui_left"):
		axis.x -= 1
	elif Input.is_action_pressed("ui_right"):
		axis.x += 1
	else:
		axis.x = 0

	# Normalize the vector.
	axis = axis.normalized()

	# Move the node and detect collisions.
	move_and_collide(axis * speed * delta)
A last one more tip #
Input.is_action_pressed("key") returns a boolean; casting it to an int will
return 1 if the key is pressed and 0 if not.
You can simplify the code a bit by doing as follows:
    extends CharacterBody2D

var speed: int = 300
var axis: Vector2 = Vector2.ZERO


func _physics_process(delta: float) -> void:
	axis.y = int(Input.is_action_pressed("ui_down")) - int(Input.is_action_pressed("ui_up"))
	axis.x = int(Input.is_action_pressed("ui_right")) - int(Input.is_action_pressed("ui_left"))

	axis = axis.normalized()

	move_and_collide(axis * speed * delta)
This will give the same result as the previous script but is a bit more compact. Let’s understand how this works.
If you press the key down, the result will be 1 - 0 = 1, so
you will go down; if you press up only, the result will be
0 - 1 = -1, so you will go up. The same thing happens for the
left and right keys.
Awesome, right? 😎
Conclusion #
You learned what Godot Engine is and how to use it and play a little with it.
You will want to continue your journey with Godot and create some awesome games!
Thank you for reading me. If you enjoyed this article and consider offering me a ☕, I will be very grateful, and it will help me write new articles.


